After exploring landforms with Google Streetview, the next step of our exploration was to create a project using Makerspace to show the connection between how a person lives and their environment.
Makerspace is an opportunity for students to create something to display their understanding of a topic. Students work together in partners or groups to create a Make, and after listening to the feedback of their peers, the students are given a chance to revise their creation. The purpose of Maskerspace is to foster collaboration among students and promote higher level thinking.
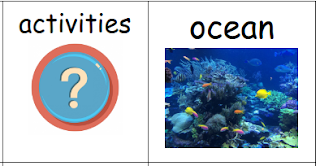
Students were allowed to pick their own partners (with my approval of course) for this project. Then they drew a card that displayed a landform and a component of human life (shelter, food, clothing, and activities). Below is an example of one of the cards for the project. Click here for the complete set.
Students were allowed to use anything and everything to create their project. For the past few weeks, we asked our parents to collect recyclable items such as small boxes, toilet paper rolls, tin cans, etc. as well as craft items such as yarn, ribbon, pieces of fabric, craft sticks, and the list goes on. This gave parents the perfect opportunity to clean out their closets. Click here to see a more comprehensive list of suggested items for Makerspace.
The materials needed for Makerspace are stored on a cart in the hallway. Students are allowed to go to the cart during the Make to get the items that they need for their project. Craft items are spread out on my teacher table for student use. Students are encouraged to use only what they need and return the rest for someone else to use for their project.
The outcome of Makerspace is not the project that the students create; it is the conversations that students have during the making of their creation. For this project, students not only have to be able to know what landform they are creating, but they have to connect the landform to a certain aspect of human life. They have to work together to display their thinking about this topic. See below the project about a person fishing in the ocean. Would someone be able to do the same activity in the desert?
I am still discovering how Makerspace and technology fit together. Makerspace works best when students work together to create a project. When students work together, more ideas are shared and the product of their collaboration is improved. We know that we want our students to learn to work collaboratively together in order to prepare them for the workplace, especially STEM jobs. Makerspace offers a place for students to use their creativity to solve problems. Perhaps Makerspace is a beginning playground to prepare our students for the real world.
Join our first grade class as we explore integrating technology together this year.
Monday, February 27, 2017
Saturday, February 18, 2017
Exploring Landforms with Google Street View
Today my students went swimming with turtles in the ocean, running with zebras on the plains, walking with camels in the desert, hiking with llamas in the mountains, and exploring with penguins on the polar ice caps. My students went to all of these places in our classroom using technology on the Chromebook.
One thing to be careful about when using Google Street View is that some links have trouble loading. I knew this might be a problem because the page did not always load correctly when I was exploring Google Street View. It is obvious when the page does not load correctly because there is a black screen. Therefore, I taught the students that if the link did not load, they needed to close their tab and try again. This required a lot of patience for the students because they were eager to explore each new landform.
If my class had access to Chromebooks everyday, I would break this lesson down into exploring one landform each day. Sometimes all of the elements that the students were looking for (shelter, food, and clothing) were not in the given link that I assigned. For the lesson, I would explore the assigned link for the landform together, and then give the students time to explore other destinations of the same landform in order to find more elements on how humans lives are different based on their environment.
After our virtual landform exploration, each student choose a landform and wrote about it in a collaborative Google Slide. Check out our class eBook about landforms. You can learn more about collaborative Google Slides here.
My students enjoy any type of project on the Chromebook, but they absolutely loved exploring different types of landforms with Google Street View. The room was full of excitement as the students looked for examples of shelter, food, and clothing at different places around the world. The students were eager to share what they found with their friends, and they made many connections on how a human's environment affects the way they live.
I created a Hyperdoc for the lesson (see below) and assigned it to the students in Google Classroom. Each landform is numbered and labeled with a picture so that the students can easily follow along with the lesson. Next to the landform is a link to Google Street View where the students can explore the landform in a virtual environment. When students are done exploring, there is an empty box available for the students to respond to their virtual experience and write notes about what they encountered.
If my class had access to Chromebooks everyday, I would break this lesson down into exploring one landform each day. Sometimes all of the elements that the students were looking for (shelter, food, and clothing) were not in the given link that I assigned. For the lesson, I would explore the assigned link for the landform together, and then give the students time to explore other destinations of the same landform in order to find more elements on how humans lives are different based on their environment.
After our virtual landform exploration, each student choose a landform and wrote about it in a collaborative Google Slide. Check out our class eBook about landforms. You can learn more about collaborative Google Slides here.
Thursday, February 9, 2017
Creating Books with Google Slides
Today the students created their own book in Google Slides. Each slide was a separate page in their book. We researched information about groundhogs all week long, and this was a great opportunity for the students to share the information they learned.
I assigned each student a Google Slide Presentation with four blank slides through Google Classroom. I only assigned four slides because I didn't want the students to become overwhelmed, and if a student needed more pages, it was the perfect opportunity to teach them how to insert a slide into their presentation.
The students were excited to make their own book. The first slide was the title page. The rest of the slides contained information about what they had learned about groundhogs.
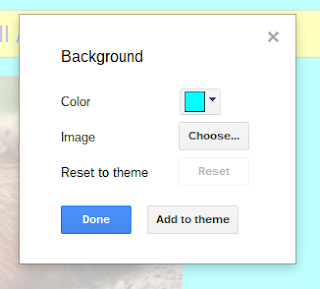
It seems that there were two type of books that emerged from this project based on the type of background the student picked. When inserting a background into Google Slides, you have the option to pick a solid color or insert an image. (Please note: There is a background button on the toolbar in Google Slides. This makes inserting a background very easy for the students because it eliminates the need to right click.)
Here are the links to the completed Groundhog books: solid color background and images as background. Overall, the students did an awesome job, and I am very proud of their work.
I assigned each student a Google Slide Presentation with four blank slides through Google Classroom. I only assigned four slides because I didn't want the students to become overwhelmed, and if a student needed more pages, it was the perfect opportunity to teach them how to insert a slide into their presentation.
The students were excited to make their own book. The first slide was the title page. The rest of the slides contained information about what they had learned about groundhogs.
It seems that there were two type of books that emerged from this project based on the type of background the student picked. When inserting a background into Google Slides, you have the option to pick a solid color or insert an image. (Please note: There is a background button on the toolbar in Google Slides. This makes inserting a background very easy for the students because it eliminates the need to right click.)
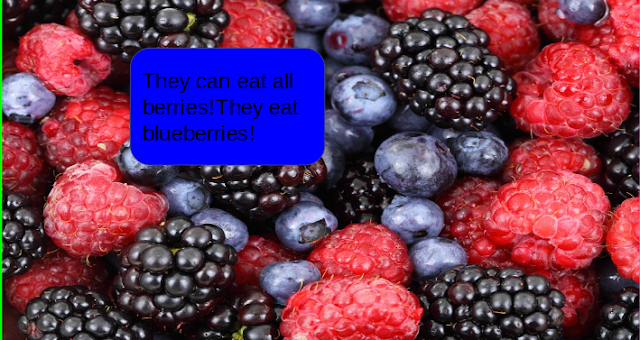
When students choose a solid color background, they had to insert more images and add more details to make the page look complete. However, when the students inserted an image as the background, the presentation looked more professional (in my opinion) and the student only had to add the words. Check out the two slides below. Perhaps less is better when it comes to professional design.
Here are the links to the completed Groundhog books: solid color background and images as background. Overall, the students did an awesome job, and I am very proud of their work.
Saturday, February 4, 2017
Chatting with Students on Google Slides (Using the Comment Feature)
Chatting with students is the most fun that I have had with a Chromebook project so far. My students are working independently now, so I have the opportunity to sit back and give them feedback. Through this activity, I really saw some of their personalities come out.
Google Slides does not really have a chat feature, but the program does allow you to comment on a student's slide, and the student can send a comment back to you. This is a great opportunity to give positive feedback to the students as well as offer suggestions for improvement. The students loved it when I sent them a message and were eager to reply back to me.
Google Slides does not really have a chat feature, but the program does allow you to comment on a student's slide, and the student can send a comment back to you. This is a great opportunity to give positive feedback to the students as well as offer suggestions for improvement. The students loved it when I sent them a message and were eager to reply back to me.
The students would tell me when they sent me a message back. Usually it would be a thank you or an ok like the picture above. I would read these messages and move on without an reply; however, my students were disappointed when there was not a reply to their simple message. Therefore, if Google is reading my post, I think it would be a good idea to add a like feature to the comment box so that a student's comment can be acknowledged easily. This would make many of my students very happy. Until then, it is best to acknowledge all of the students' messages with a simple reply or they will continue pestering you until you do.
I also liked to drop a few inside jokes in the comments for the students to enjoy (even though the students often didn't get my humor). One of the students always used speech call-outs in her projects. I was very surprised that she didn't use one in her project about the groundhog. I nicely made the suggestion, and she revised her work.
Commenting with students works best with Google Slides. Everyone is working on the same presentation, and it is easy to move back and forth between all of the students. The commenting feature also works in Google Drawings, but it is hard to maintain because you have to open up each student's project individually. I probably had a least 15 tabs opened at once, and my computer froze.
My next step in using the comment feature in Google Slides is to have students look at a completed presentation and give each other positive feedback through comments. I think the students will enjoy chatting with each other, but I will have to closely monitor the conversations to make sure that they are treating each other with respect. I will update you on how the it goes after I have the opportunity to test it out.
Subscribe to:
Posts (Atom)


