This year, my first grade class started creating projects in
Makerspace to display their thinking about a topic. Here are some tips for incorporating Makerspace into the elementary classroom.
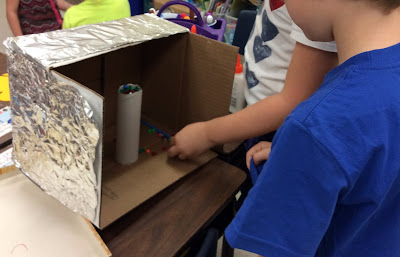 |
| Students create a slushy machine for their house. |
1. It Is All About the Conversations, Not the Product
Sometimes you look at a student's project and think, what is that? However, when you ask the students about their project, all of a sudden, what you are looking at makes sense. The students are able to explain the process that they used to create the project and their thinking behind the project. This is the goal of Makerspace: students working together to make a creation to display their thinking.
2. Planning Is Important
I like to give my students time to think about their task before they start building their creation in Makerspace. Planning can be completed on a sheet of paper or a computer. In my classroom, students work
collaboratively to make plans in Google Drawings. It is amazing to see how much their finish product resembles their plan.
3. Utilize a Parent Volunteer to Help with the Hot Glue Gun and Sharp Scissors
Have you ever tried to glue anything to a tin can or cut the top off a plastic milk jug? Asking a parent to help with the hot glue gun and sharp scissors may sound silly, but theses tasks are important when working with young students in Makerspace. Allowing a volunteer to help with these tasks frees the teacher to roam around the room and have those meaningful conversations with students about what they are thinking as they create their projects.
4. Students Need to Try Before They Ask for Help
Some students become dependent on the teacher or parent volunteer to complete simple tasks. Therefore, our class has incorporated the rule that students need to try first before asking the volunteer (or anyone) for help. This helps the students develop independence and increase problem solving skills.
5. Have Something for Students to Complete When They Finish
I've learned this one the hard way, twice. I have been deep in conversation with students about their creation. All of a sudden, I look up and a lot of the students in the room are in mass chaos. Students are finished with their creation and roaming around the bothering other students and hindering progress. Students need an assignment when they finish their Makerspace project. Some ideas are writing about their creation, making an advertisement for their creation, or explaining the process they used to make their creation with a storyboard.
6. Be Prepared to Be Messy and Allow Time for Clean Up
Creating projects in Makerspace is messy. It seems that all of the materials available to the students either end up on the tables or on the floor. However, it is the students' responsibility to clean up. Make sure to plan 10 to 15 minutes for clean up.
7. Reserve Time for Plussing and Revision
Plussing is an opportunity for students to receive feedback about their creation. In our classroom, we complete plussing as a whole group but other teachers do this activity in small groups. Students bring their project to the group, and students tell the creator something that they like about the project and something that they wish the creator would improve. It is important for students to hear the constructive criticism and use these ideas to make their project better. After plussing, students are given 20 minutes to revise their project. They are required to pick one idea that they received during plussing to improve their creation during revision.
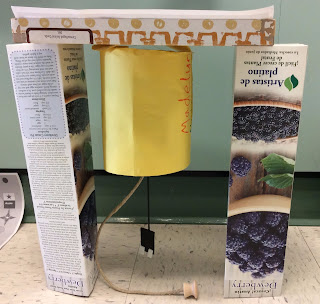 |
| This is a rechargeable light bulb for when the electricity goes out. Before plussing, the students held the light bulb upside down. During revision, the students made a stand for the light bulb so that it could hang upside down on its own. |
8. Students Will Use What You Have to Create Their Projects
When collecting items for Makerspace, I was worried about having the "right stuff" for the students to create their projects. However, I learned that students have an idea in their head, and they will use the items around them to make their creation. Students do not mind using the box with Amazon Prime tape across the front. They will adapt and use what is available to them.
9. Teach Students to Only Use What They Need
Sometimes the students' eyes get too big for the task that they need to accomplish. They will always want to pick the biggest box and the coolest design items. However, it is important to remind students to use only what is important to their project. I also teach students to return any pieces that they do not use so that others can use them in their project. Makerspace is all about reusing and recycling.
10. Makerspace Looks Different in Every Classroom
Right now, there are three first grade teachers piloting Makerspace in our school. Makerspace looks different in all three classrooms. Therefore, it is important to customize Makerspace for your classroom. Jump in and see what works for you.
Thank you to Amber Dixon and Teresa Jay for going on the Makerspace journey with me. They have spent countless hours reflecting and revising the Makerspace process with me for our classrooms.


